一、环境
cocos cocos2d-x-3.16
AndroidStudio3.41
ndk-r14b
sdk25 28 --测了这两个版本都是可以滴
二、打开项目修改ndk版本
使用AndroidStudio打开 "项目目录/frameworks/runtime-src/proj.android-studio" ,如果报ndk或jni相关错误,修改ndk版本,打开File/ProjectStructure窗口,选择SDK Location,重新设置Android NDK location的目录为ndk-r14b的目录。ndk是一个工具用来帮助android访问本地c++代码的,cocos2d-x-3.16使用ndk14版本亲测合适。
三、修改gradle中的目标abi和sdk版本
如果AndroidStudio提示更新gradle的版本,尽量选择不更新,可能会出问题。选择Project视图,眼光落在proj.android-studio目录下。打开gradle.properties,指定cpu架构和sdk版本信息
PROP_COMPILE_SDK_VERSION=25 --编译的sdk版本
PROP_MIN_SDK_VERSION=10  --运行最低的sdk版本
PROP_TARGET_SDK_VERSION=25 --最优最适合的sdk版本
PROP_APP_PLATFORM=10
PROP_APP_ABI=x86:armeabi --指定cpu架构
打开app/Application.mk,指定cup架构
APP_ABI := x86:armeabi
四、lua代码的加密和解密
加密可以在windows下使用cocos luacompile命令编译成luac脚本,可以在你的项目目录中,新建一个.bat文件,编写为:
cocos luacompile -s D:\projects\HelloLua\simulator\win32\src -d D:\projects\HelloLua\src -e -k keykey -b xixixixixixi --disable-compile
# -s指定的是原lua目录
# -d指定的是编译到的目标目录
# -e表示加密
# -k指定加密的key值
# -b指定加密的密钥
解密的话需要修改c++代码,打开frameworks/runtime-src/Classes/AppDelegate.cpp,找到applicationDidFinishLaunching方法里面的一行代码,替换为上面加密的key值和密钥
stack->setXXTEAKeyAndSign("keykey", strlen("keykey"), "xixixixixixi", strlen("xixixixixixi"));五、打包
查看Build菜单下的子菜单,点击生成apk就行了
local tb = {}
tb.name = "chicai"
tb.age = 18
local jstr = json.encode(tb) --编码
local tt = json.decode(jstr) --解码
local xhr = cc.XMLHttpRequest:new()
xhr.responseType = cc.XMLHTTPREQUEST_RESPONSE_STRING  --返回的数据类型,可以是json等
xhr:open("GET","http://www.baidu.com")
local function onReadyStateChange()
    if xhr.readyState == 4 and xhr.status == 200 then
        print( xhr.response )
    end
    xhr:unregisterScriptHandler()
end
xhr:registerScriptHandler(onReadyStateChange)
xhr:send()  --POST时,可以通过这个发送参数 GET使用链接附带参数
local userDefault = cc.UserDefault:getInstance()
userDefault:setStringForKey("name","chicai")
userDefault:setIntegerForKey("age",18)
userDefault:setFloatForKey("f",18.8)
userDefault:setBoolForKey("enable",true)

print( userDefault:getStringForKey("name") )
print( userDefault:getIntegerForKey("age") )
print( userDefault:getFloatForKey("f") )
print( userDefault:getBoolForKey("enable") )
local sharedFileUtils = cc.FileUtils:getInstance()
local filepath = sharedFileUtils:fullPathForFilename("666.txt") --获取完整路径
print( sharedFileUtils:fullPathForFilename("666.txt") ) --res/666.txt
print( sharedFileUtils:isFileExist("HelloWorld.png") ) --判断文件是否存在
print( sharedFileUtils:getStringFromFile(filepath) )  --读取文件内容
local writeablePath = sharedFileUtils:getWritablePath() --根据不同的平台,获取可写可读路径
--将路径添加到搜索路径中 在指定路径中没找到文件,就会到这些搜索路径中查找
sharedFileUtils:addSearchPath(writeablePath)
--filename声音文件路径 loop是否循环 self.musicVolume声音大小
self.bgMusicAudioID = ccexp.AudioEngine:play2d(filename, loop, self.musicVolume)  --播放
ccexp.AudioEngine:pause(self.bgMusicAudioID) --暂停
ccexp.AudioEngine:resume(self.bgMusicAudioID) --继续
ccexp.AudioEngine:stop(audioID) --停止
ccexp.AudioEngine:pauseAll()
ccexp.AudioEngine:resumeAll()
ccexp.AudioEngine:stopAll()
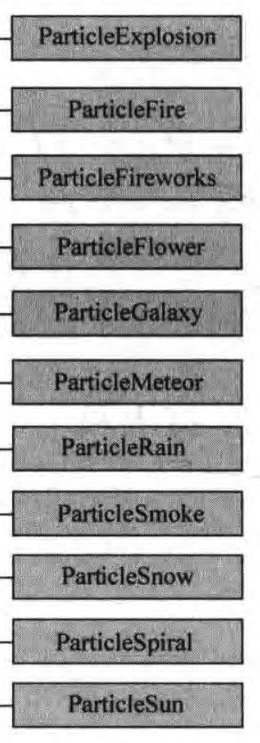
local particleSystem = cc.ParticleFire:create()
particleSystem:setPosition(cc.Director:getInstance():convertToGL(cc.p(230,380)))
self:addChild(particleSystem)

function MainScene:onCreate()

    self.uiRoot = cc.CSLoader:createNode("MainScene.csb")
    self.uiRoot:addTo(self)

    self.myImage = self.uiRoot:getChildByName("HelloWorld_2")

    local imgae = self.uiRoot:getChildByName("Image_2")
    imgae:setVisible(false)

    self.spriteFrame = cc.SpriteFrameCache:getInstance()
    self.spriteFrame:addSpriteFrames("plist/testPlist.plist")

    self.sprite = cc.Sprite:createWithSpriteFrameName("logo/HelloWorld.png")
    self:addChild(self.sprite)
    self.sprite:setPosition(cc.p(display.cx,display.cy - 200))

    local listener = cc.EventListenerTouchOneByOne:create()
    listener:setSwallowTouches(true)
    listener:registerScriptHandler(handler(self,self.touchBegin), cc.Handler.EVENT_TOUCH_BEGAN)
    listener:registerScriptHandler(handler(self,self.touchMove),cc.Handler.EVENT_TOUCH_MOVED)
    listener:registerScriptHandler(handler(self,self.touchEnd),cc.Handler.EVENT_TOUCH_ENDED)

    local dispatch = cc.Director:getInstance():getEventDispatcher()
    dispatch:addEventListenerWithSceneGraphPriority(listener,self.sprite)

end

function MainScene:touchBegin(touch,event)
    dump(touch:getLocation(),"touch")  --点击位置
    local node = event:getCurrentTarget() --监听目标,不已目标的大小为触摸区域,无论怎么样都是整个屏幕
    return true --返回true吞没事件 move和end就可以触发了
end

function MainScene:touchMove(touch,event)
    print("7777")
end

function MainScene:touchEnd(touch,event)
    print(88888588)
end
self.spriteFrame = cc.SpriteFrameCache:getInstance()
self.spriteFrame:addSpriteFrames("plist/testPlist.plist")

local animation = cc.Animation:create()
animation:addSpriteFrame(self.spriteFrame:getSpriteFrame("logo/111.png"))
animation:addSpriteFrame(self.spriteFrame:getSpriteFrame("logo/HelloWorld.png"))
animation:setDelayPerUnit(0.15) --图片切换间隔
animation:setRestoreOriginalFrame(true) --播放完后是否回到第一张

local animate = cc.Animate:create(animation)
self.sprite:runAction(cc.RepeatForever:create(animate))
Animation是动画类,它保存很多动画帧;Animate是动作类;将Animation转化为Animate就可以看到动画播放了

