读一读
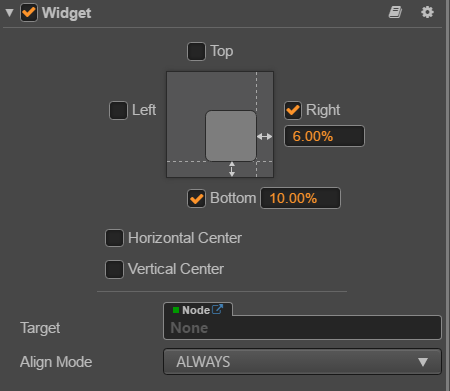
对需要定位放置的物体添加Widget组件,可以勾选指定上下左右相对父物体的位置,这个位置信息可以是px也可以是%
const {ccclass, property} = cc._decorator;

@ccclass
export default class NewClass extends cc.Component {

    @property(cc.Node)
    particle:cc.Node = null

    toggleParticlePlay()
    {
        let myParticle:cc.ParticleSystem = this.particle.getComponent(cc.ParticleSystem);
        if (myParticle.particleCount > 0) {
            myParticle.stopSystem(); //停止播放粒子
        } else {
            myParticle.resetSystem(); //粒子效果重新播放
        }
    }
}
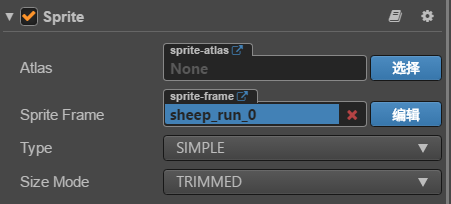
设置Sprite的Type为SIMPLE,SizeMode为TRIMMED,此时就会自动将原图片四周的透明度剔除掉,得到比较好的节点宽度和高度。
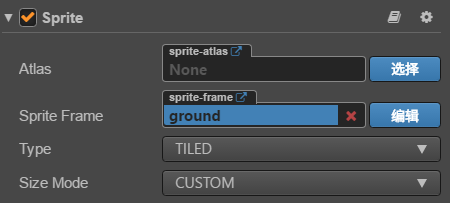
设置Type为TILED模式之后,只需要修改Node的宽度高度就可以将图片平铺到这个范围中。
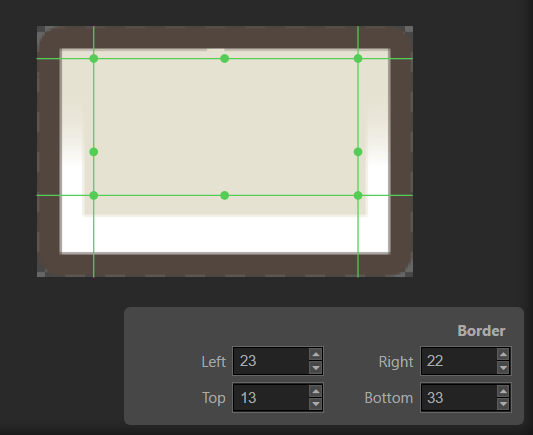
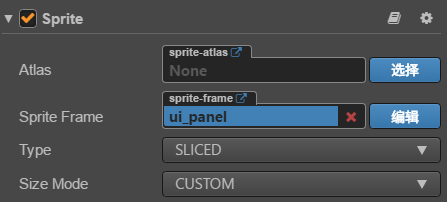
九宫格模式适用于按钮等,可以通过双击图片打开编辑器设置九宫格的范围
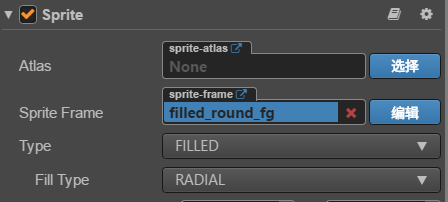
设置Sprite的Type为FILLED模式,就可以制作一种倒计时进度条的效果,FillType可以设置为圆形,水平,垂直等
const {ccclass, property} = cc._decorator;

@ccclass
export default class t_FilledSpriteControl extends cc.Component {

    speed = 0.1

    @property(cc.Sprite)
    horizontal:cc.Sprite = null

    @property(cc.Sprite)
    vertical:cc.Sprite = null

    @property(cc.Sprite)
    radial_round:cc.Sprite = null

    @property(cc.Sprite)
    radial_semicircle:cc.Sprite = null

    update (dt) {
        this._updataFillStart(this.horizontal, dt);
        this._updataFillStart(this.vertical, dt);

        this._updateFillRange(this.radial_round, 1, dt);
        this._updateFillRange(this.radial_semicircle, 0.5, dt);
    }

    _updataFillStart (sprite, dt) {
        var fillStart = sprite.fillStart;
        fillStart = fillStart > 0 ? fillStart -= (dt * this.speed) : 1;
        sprite.fillStart = fillStart; //控制水平垂直的进度
    }

    _updateFillRange (sprite, range, dt) {
        var fillRange = sprite.fillRange;
        fillRange = fillRange < range ? fillRange += (dt * this.speed) : 0;
        sprite.fillRange = fillRange; //控制圆形的进度
    }
}
const {ccclass, property} = cc._decorator;

@ccclass
export default class NewClass extends cc.Component {

    private _colorChanged:boolean = false

    changeColor()
    {
        //同一图片 不同颜色 不增加DC
        this.node.color = this._colorChanged ? cc.Color.WHITE : cc.Color.RED;
        this._colorChanged = !this._colorChanged;
    }

}
const {ccclass, property} = cc._decorator;

@ccclass
export default class t_AR extends cc.Component {

    @property(cc.Label)
    posAR:cc.Label

    @property(cc.Label)
    pos: cc.Label

    @property(cc.Node)
    goldAR: cc.Node

    @property(cc.Node)
    gold: cc.Node

    onLoad ()
    {
        let sheep = this.goldAR.parent;
        let posAR = sheep.convertToWorldSpaceAR(cc.v2(this.goldAR.x, this.goldAR.y)); //本地坐标转换到世界坐标 关联锚点
        this.posAR.string = '(' + posAR.x.toFixed(0) + ', ' + posAR.y.toFixed(0) + ')'; //保留整数显示

        sheep = this.goldAR.parent;
        let pos = sheep.convertToWorldSpace(cc.v2(this.gold.x, this.gold.y )); //本地坐标转换到世界坐标 不关联锚点
        this.pos.string = '(' + pos.x.toFixed(0) + ', ' +pos.y.toFixed(0) + ')';
    }
}
对于一些一张张散乱的图片,不方便打包成图集的,可以使用这个自动图集策略,将散乱的SpriteFrame放在同一个文件夹中,然后再这个文件夹中右键-》新建-》自动图集配置,然后在属性检查器中配置参数,可以点击预览查看打包的图集,自动图集会把当前文件夹所有的SpriteFrame打包成一个图集,真正打包成图集的是在构建的时候,可以在构建完后的res/raw-assets下查看图集是否生成成功。
const {ccclass, property} = cc._decorator;

@ccclass
export default class PoolStudy extends cc.Component {

    somePool:cc.NodePool = null

    start ()
    {
        this.somePool = new cc.NodePool()

        for(let i = 0;i<10;i++)
        {
            let node = new cc.Node()
            this.somePool.put(node) //将对象放入对象池
        }

        if(this.somePool.size() > 0)
        {
            //从对象池中获取对象
            let getNode = this.somePool.get()
        }
    }

    onDestroy()
    {
        //清空对象池
        this.somePool.clear()
    }
}